Clickbank conversion tracking can be tricky. Although Clickbank does provide support for placing Google Adwords conversion pixels, this is pretty redundant. I do not think most affiliates would drive traffic directly from Adwords to an affiliate offer. Plus, today the typical affiliate would need to use traffic sources beyond just Google Adwords.
As a Clickbank affiliate marketer, I have tried to make Clickbank conversion tracking work. However, they do not let me place my pixel code or have a postback like other affiliate networks do.
When we developed Shorty, we wanted to make sure that we supported Clickbank affiliates. We did notice that Clickbank supports SubID tracking (they use TID). These values can be customized with every click, and will appear in the reports you can download.
There we found a solution.
So how do you track your Clickbank affiliate commissions in one central dashboard, mixed in with other affiliate programs you may be a part of?
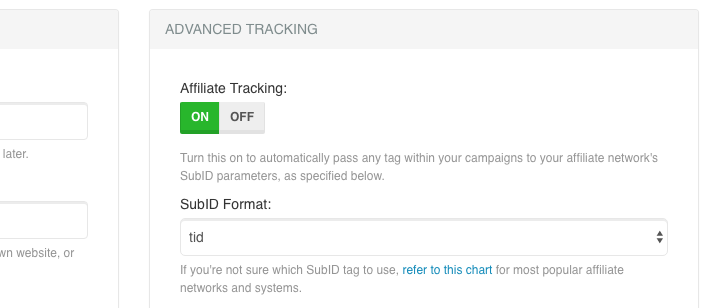
Step 1: Enable Affiliate Tracking and Choose TID
Create a new tracking link in Shorty, and enable Affiliate Tracking. In the drop down list, choose “tid”.

This is the format used by Clickbank to capture SubID information. I’ve written a separate guide to SubID tracking and why it’s still important today, make sure you read that as well.
Step 2: Clickbank Conversion Tracking Test
Save your affiliate link, and test it out. You should see &tid=1234 automatically added to the very end of the URL in the browser, with 1234 or another number being your unique Click ID number.
This may not be visible for every site you are promoting, but if you’ve done step 1 above correctly it will work. The data has been captured by Clickbank, and will show up in your reports.
Step 3: Download & Import Reports
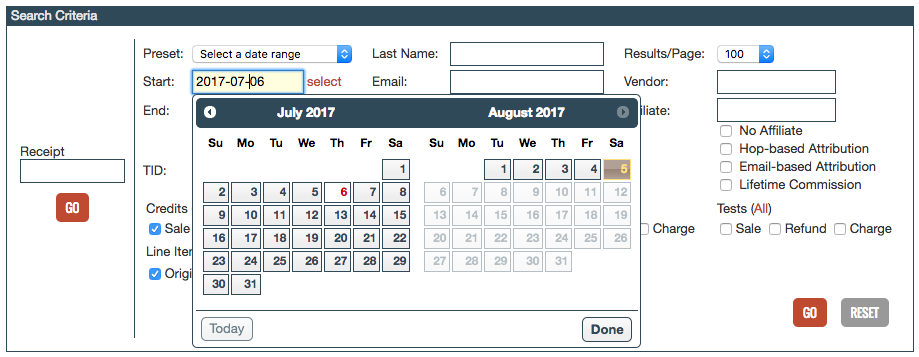
When you have made commissions, you can download your report from ClickBank. Select a date range to be more specific, to include the conversions recorded since you started using Shorty and the feature in Step 1.

They will provide you with a CSV file, which can be opened in Excel or Notepad. Here’s how it will look like in Notepad, and you can see the unique Click ID number highlighted:

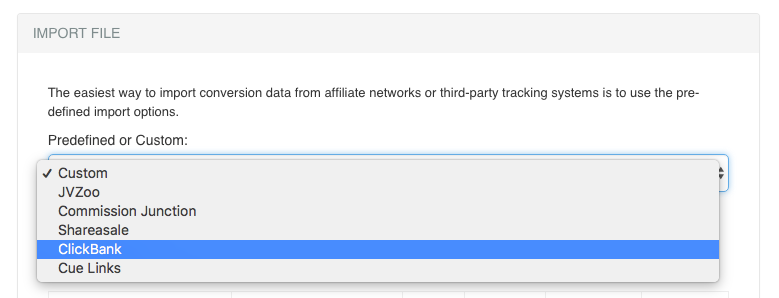
Next, in Shorty click on Add / Import Conversions and choose Clickbank as the pre-defined import format.

This will only work if you have not opened or edited the report you downloaded from Clickbank. Import the report without opening it, or the file may be changed by your computer.
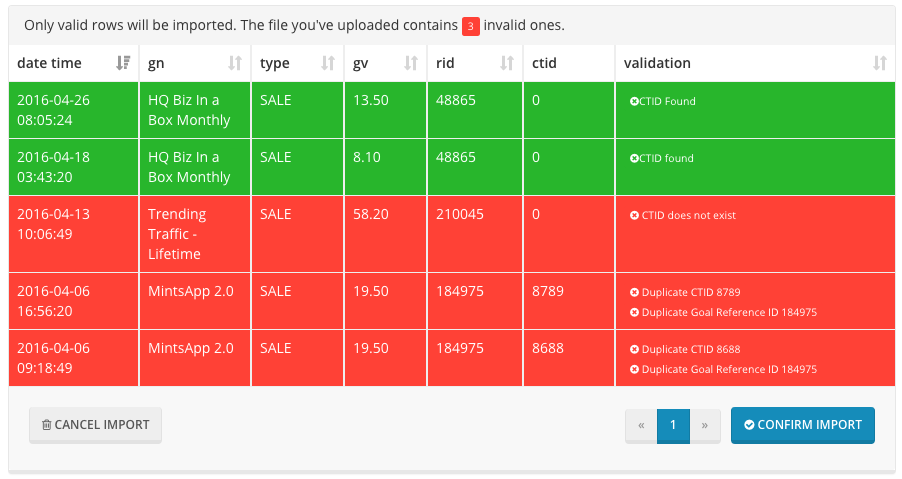
Next you will see the conformation screen, where we show you the results. Here you can manually override and choose to import conversions that do not have a TID value as well.

Click on Confirm Import to import the valid conversions. Please watch our video tutorials for a step-by-step guide on how this works.
That’s all there is to Clickbank conversion tracking with Shorty. Sure, the process is manual. However, unless Clickbank gives you the ability to place a pixel code or postback URL (both are available in Shorty), this is the most reliable option.
To make this process more manageable, keep track of the dates. Do not re-import results that you have already imported into Shorty. In the conversions table, you can see the date of the last conversion you have recorded. When you generate your report, use the following date range to avoid duplicates.
This is the same method you’ll use for JVZoo conversion tracking. Its easier to implement Peerfly conversion tracking because they allow postback URLs.
So it’s all up to Clickbank.
If they decide to make conversion tracking easier for affiliates, we already have the tools to match. For now, this is the solution we have in Shorty for Clickbank conversion tracking.
Shorty is an affordable, complete solution for affiliate tracking based on WordPress. Make sure you get your copy today and start tracking your Clickbank affiliate commissions like a pro!


